Backing Up Your Data

Before starting you may find it easiest to create a Notepad.txt file in which to keep notes that you'll be taking during this process for the convenience and accuracy of copying and pasting file paths and names.
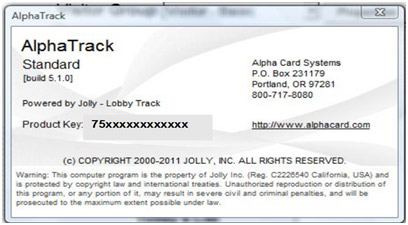
First, identify the existing AlphaTrack version and License Key on the existing computer.
- Launch the AlphaTrack program on the existing computer
- Click on the Help menu, and then About Product option
- Copy the Version (Standard, Professional or Enterprise), the build version, and the Product Key (usually referred to in this document as the License Key) to the notepad document you created
Determine the Company Setup (contains all Visitor Group card designs) file on the existing computer.
- For AlphaTrack Standard, this will be C:\Program Files (or Program Files (x86) when an option) \Alpha Card Systems\Alpha Track\Sample Companies\Sample Company.jlt.
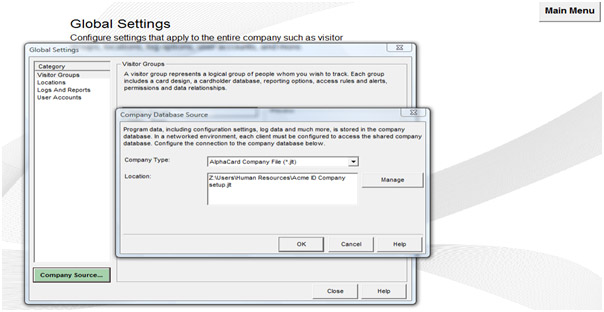
- For AlphaTrack Professional or Enterprise, you will need to navigate to Main Menu/Setup/Global Settings/Company Source. In the example below the filepath/name is Z:\Users\Human Resources\Acme ID Company setup.jlt.
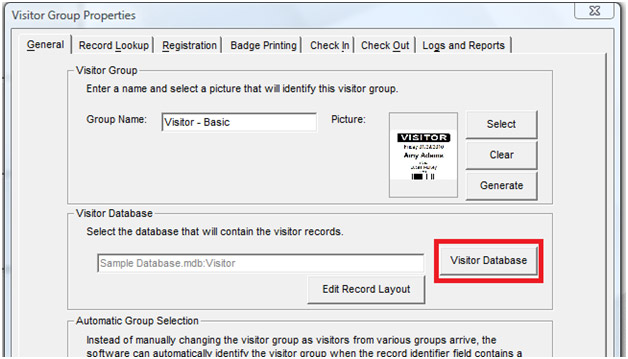
Determine all associated Visitor Group databases from the existing computer.
- In the Main Menu, select the Visitor Group and click on Properties

- Click on the Visitor Database button.
- If the Database Type is Sample Database as shown below, the filepath/name is C:\Program Files (or Program Files (x86) when an option)\Alpha Card Systems\Alpha Track\Sample Databases\Sample Database.mdb.
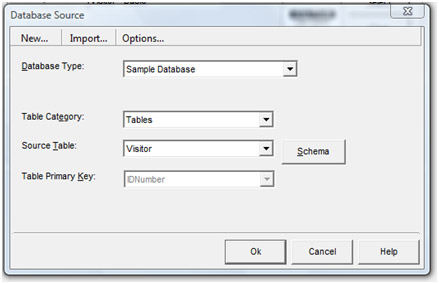
- If the Database Type is anything other than Sample Database, the type, filepath/name, Source Table, and Primary Key will be reported as shown below:
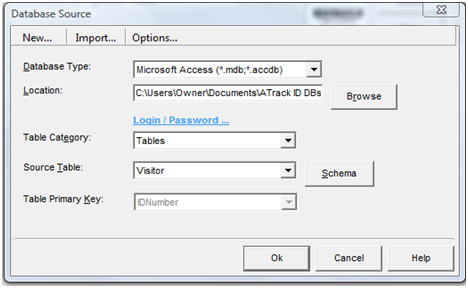
- Repeat this process for all Visitor Groups being used by the end user, noting the database type, filepath/name, Source Table, and Primary Key for each
Then you need to determine Photo handling on the existing computer
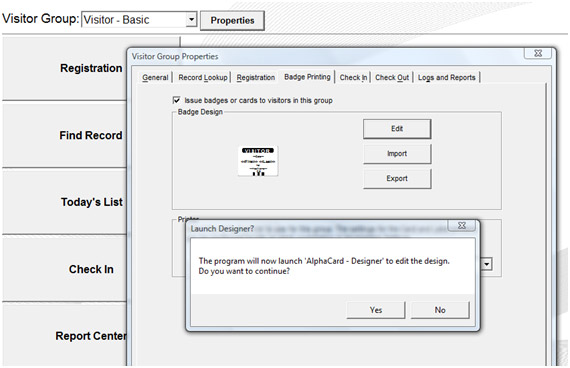
- In the Main Menu, select the Visitor Group and click on Properties

- Click on the Badge Printing tab, then the Edit button, and the Yes button to continue launching the AlphaCard Designer
- If the Photo object label begins with two carats (may be truncated) on both ends as shown below, then the photos for this Visitor group are stored in the associated database as binary data and will transfer with that database
![]()
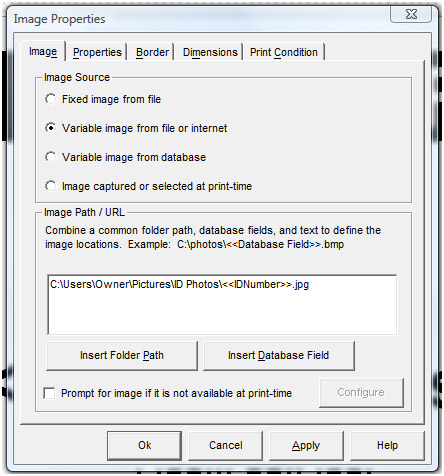
- If the Photo object label begins with a filepath as shown in the first image below, you'll need to open the properties for that object by double-clicking (or right-click and choose properties) on it
![]()
In the example below, “C:\Users\Owner\Pictures\ID Photos\<
Back up (copy) the Company Setup file, database(s) and photo image file folders on the existing computer.
At this point, you should have notes as shown below:
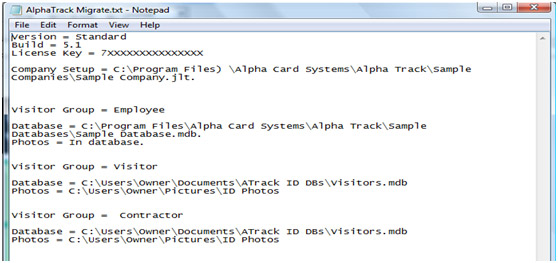
Close the AlphaTrack program and copy the Company Setup file, Database Files, and Photo folders that you identified in the preceding 3 steps and copy them to a flash drive, CD-Rom, or shared networked folder if accessible by both the existing computer and the target computer.
Note: If you determined in the previous steps that all of your files are on a networked folder accessible by the target computer you only need to back up the Workstation Settings file, copy it to the same location on the target computer and relink the Company Setup file as shown in step 2 of page 2 (clicking on the Manage button) to configure the software on the target computer.
Back up (copy) the Workstation Settings file from the existing computer:
- 1. Navigate to C:\Program Files\Alpha Card Systems\Alpha Track\Application Data and copy the jollyLocalApplicationData.dat to a flash drive, CD-Rom, or shared networked folder if accessible by both the existing computer and the target computer.
Go to step two: Install AlphaTrack on the Target Computer. You may also download a PDF version of this guide: AlphaTrack Migration Instructions (PDF)
